Benefit your neighborhood bats with this DIY bat house
Always bet on bats (for pest control).

Bats are a critical part of ecosystems worldwide and provide a number of significant benefits to humans, including pest control, pollination, and seed disbursement. Of those three, the biggest reason you might want bats around is likely their ability to hunt insects that are hunting you.
But where bats live alongside people, they are threatened by a host of problems, including habitat destruction, pesticides that kill their food, and of course, climate change. So as much as you may want to turn your yard into a place bats want to be, you might have a hard time if they don’t have a place to hang out. Building a bat house helps address this problem and may replace a small portion of any habitat they’ve lost.
Different species of bats (there are nearly 1,400 worldwide and almost 50 in North America) use bat boxes for different reasons, such as breeding, roosting, or hibernating. But if you put one up, there’s a chance it’s just the thing a colony in your area needs to survive another season.
I based these bat house plans on a design published by Bat Conservation International, with a few modifications—what woodworker follows plans exactly? My bat box, for example, is two chambers instead of four, simply because of the amount of wood I had available. I also used cedar fence pickets instead of exterior plywood because they were cheaper, and decided not to put a vent on the side due to the cold climate in Massachusetts.
Warning: DIY projects can be dangerous, even for the most experienced makers. Before proceeding with this or any other project on our site, ensure you have all necessary safety gear and know how to use it properly. At minimum, that may include safety glasses, a facemask, and/or ear protection. If you’re using power tools, you must know how to use them safely and correctly. If you do not, or are otherwise uncomfortable with anything described here, don’t attempt this project.
Stats
- Time: 4 to 6 hours
- Material cost: $40 to $60
- Difficulty: moderate
Materials
- 1 box of (3.5-foot-long) ⅝-by-3.5-inch flat-top cedar fence pickets (about 13 boards)
- Wood glue
- 1-inch brad nails
- Exterior painter’s caulk
- Black exterior spray paint
Tools
- Miter saw
- Table saw
- Crosscut sled
- Clamps
- Parallel clamps
- Orbital sander
- Sanding discs (60- and 120-grit)
- (Optional) jointer
How to build a bat house
1. Cut the fence pickets to length on your miter saw. Before jointing wood, always cut the boards down to rough length. This makes flattening easier, and cuts down on the amount of material you’ll need to remove from warped boards.
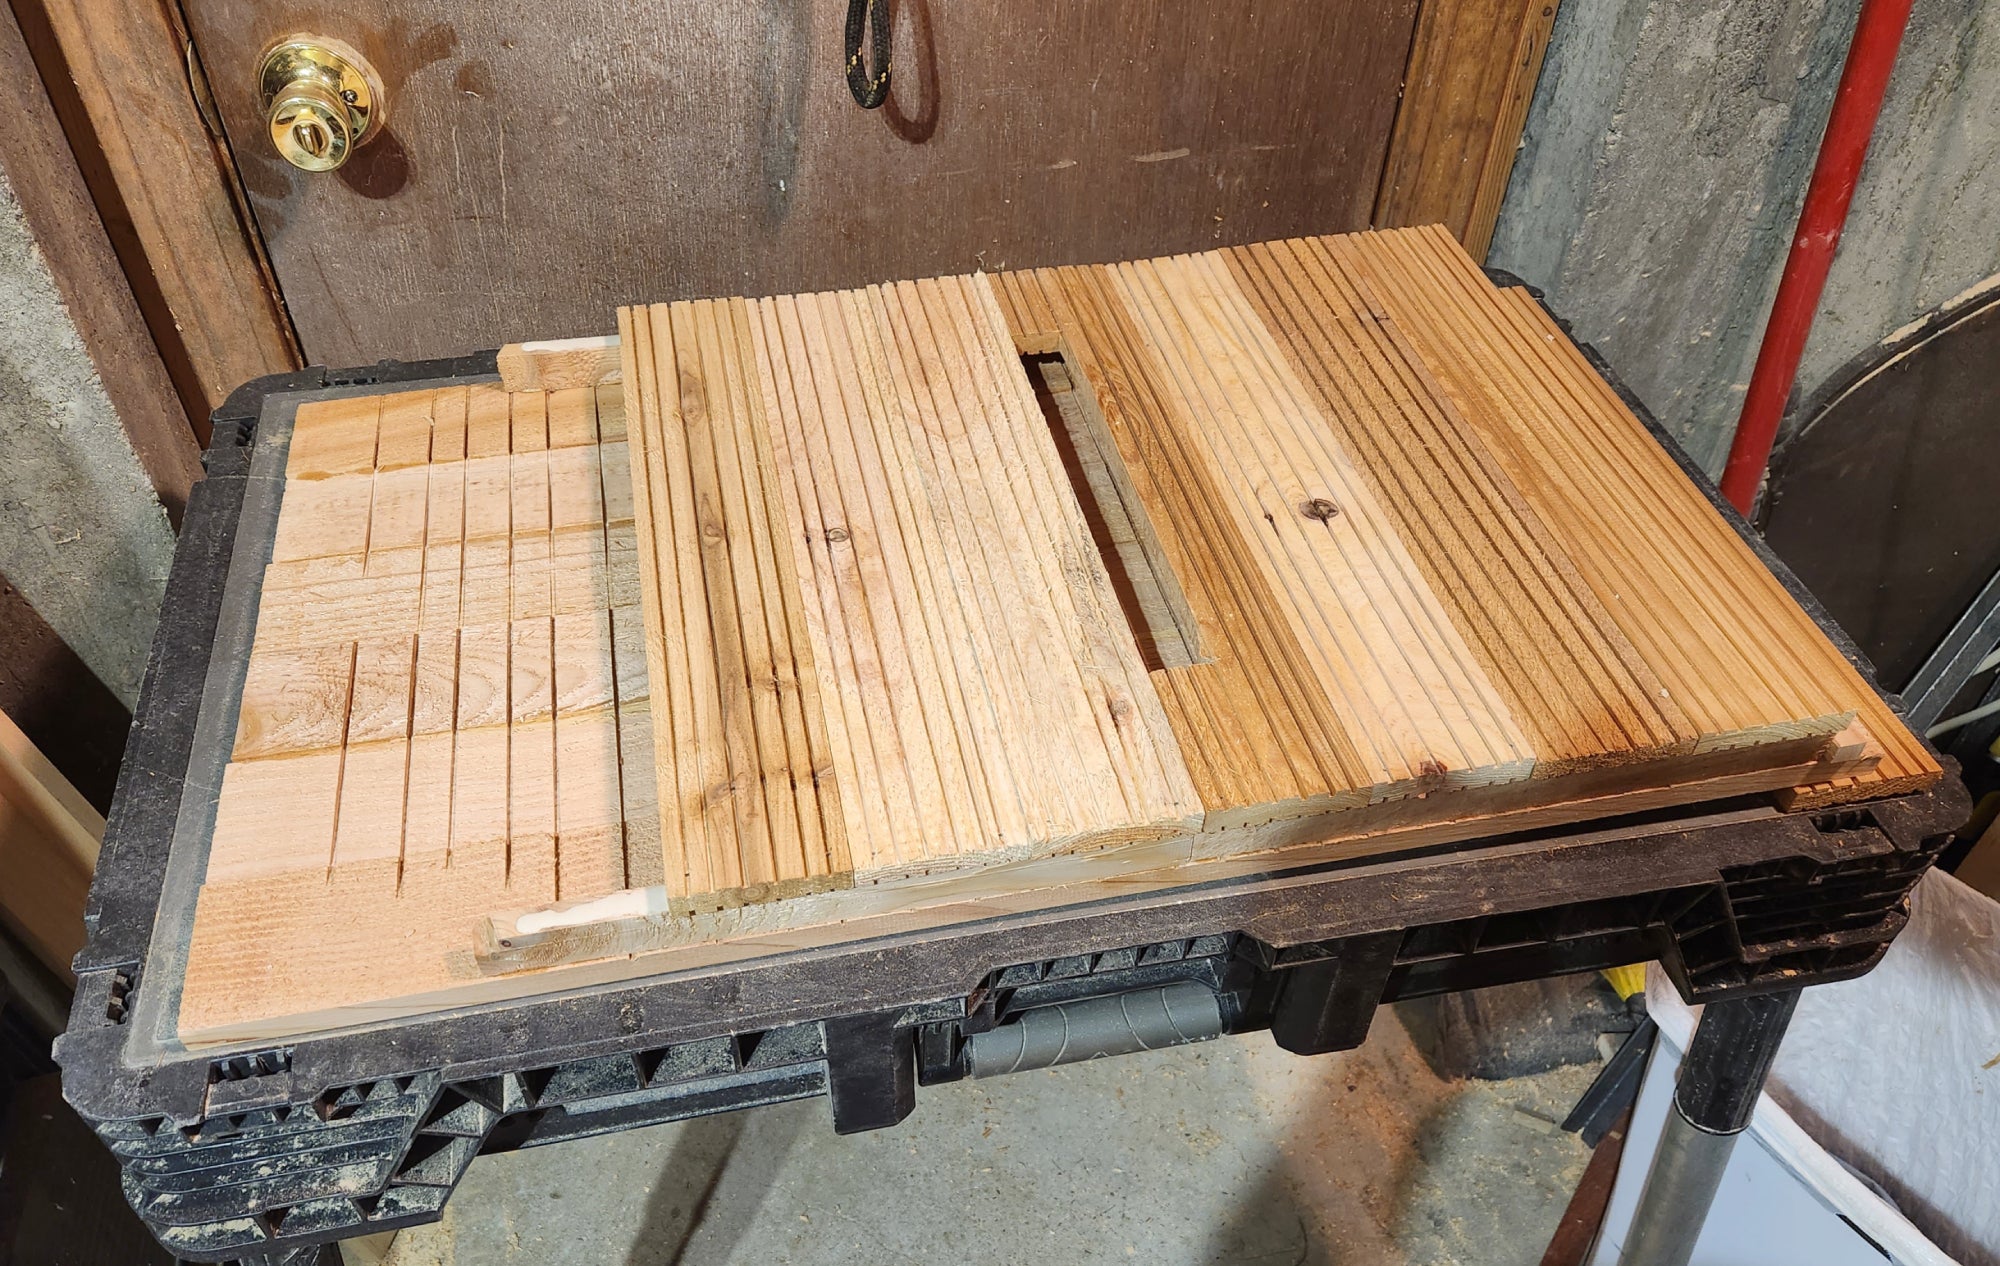
This bat box consists of three panels, each made from different lengths of wood. Although you can cut the middle and front panel boards exactly the same length because they will be the same size (24 by 18 inches), I did not. I was able to use my wood more efficiently by making the front and back panels from vertical 24-inch boards, and the middle one out of horizontal 18-inch planks. This worked because I could get one 18- and one 24-inch board out of each 42-inch fence picket. Here’s how my panel groupings broke down:
- Back panel: six (30-inch) boards
- Middle panel: eight (18-inch) boards
- Front panel: six (24-inch) boards
2. Joint one face and edge on each board. If you don’t have a jointer, you can skip face jointing for this project, and just edge joint on your table saw. But if you have access to a jointer, cleaning up one face will make assembly easier.
- Note: The jointed faces of the boards should be the outside of your panels. I left the insides of my panels rough so the bats would have an easier time clinging to them, though we will add more texture later.
3. Trim all the boards to width on your table saw. I picked 3 inches to make all of the math easy, even though I wound up with a bit more waste than was strictly necessary.
4. Glue the front and back panels together. Building panels is one of the core skills required for many woodworking projects, and a good set of parallel clamps will help immensely. Fully open your clamps and set them down side by side, about 2 inches closer together than the full width of your panels. Lay the boards across them, jointed faces down, and press the boards together by hand to make sure all the seams are tight. If they aren’t, clean them up on your jointer or table saw.
Once you’re satisfied with the layout, spread a line of glue on each touching edge of the boards, and press them together. Tighten the clamps until glue squeezes out of the seams. Then add two more clamps between and parallel to the first pair of clamps, but on top of the panel instead of below. This will give the panel a bit more stability and reduce the chance of warping.
- Pro tip: To help prevent warping even more, use cauls on each end of the panel (I skipped this step and regretted it because I got a bit of warp that I had to fix).
5. Cut the rails for the panels. This bat house has two chambers, which basically means it’s two boxes stacked together. To create those boxes, you’ll need two pairs of rails for the panels to sit on to form cavities for the bats to roost in. I crafted my rails from the scraps left over from building the panels. I had several 12-inch-long boards, so I cut eight ⅞-inch strips out of those to make the four rails.
6. Cut grooves into both sides of the 18-inch boards for the middle panel. The bats most likely to roost in a box are used to spending time in trees, says David Mizejewski, a naturalist at the nonprofit National Wildlife Federation. This means the box should be textured like a tree to give the animals something to hold on to. Shallow grooves spaced between ¼- and ½-inch apart work nicely, according to Bat Conservation International.
[Related: What bats and metal vocalists have in common]
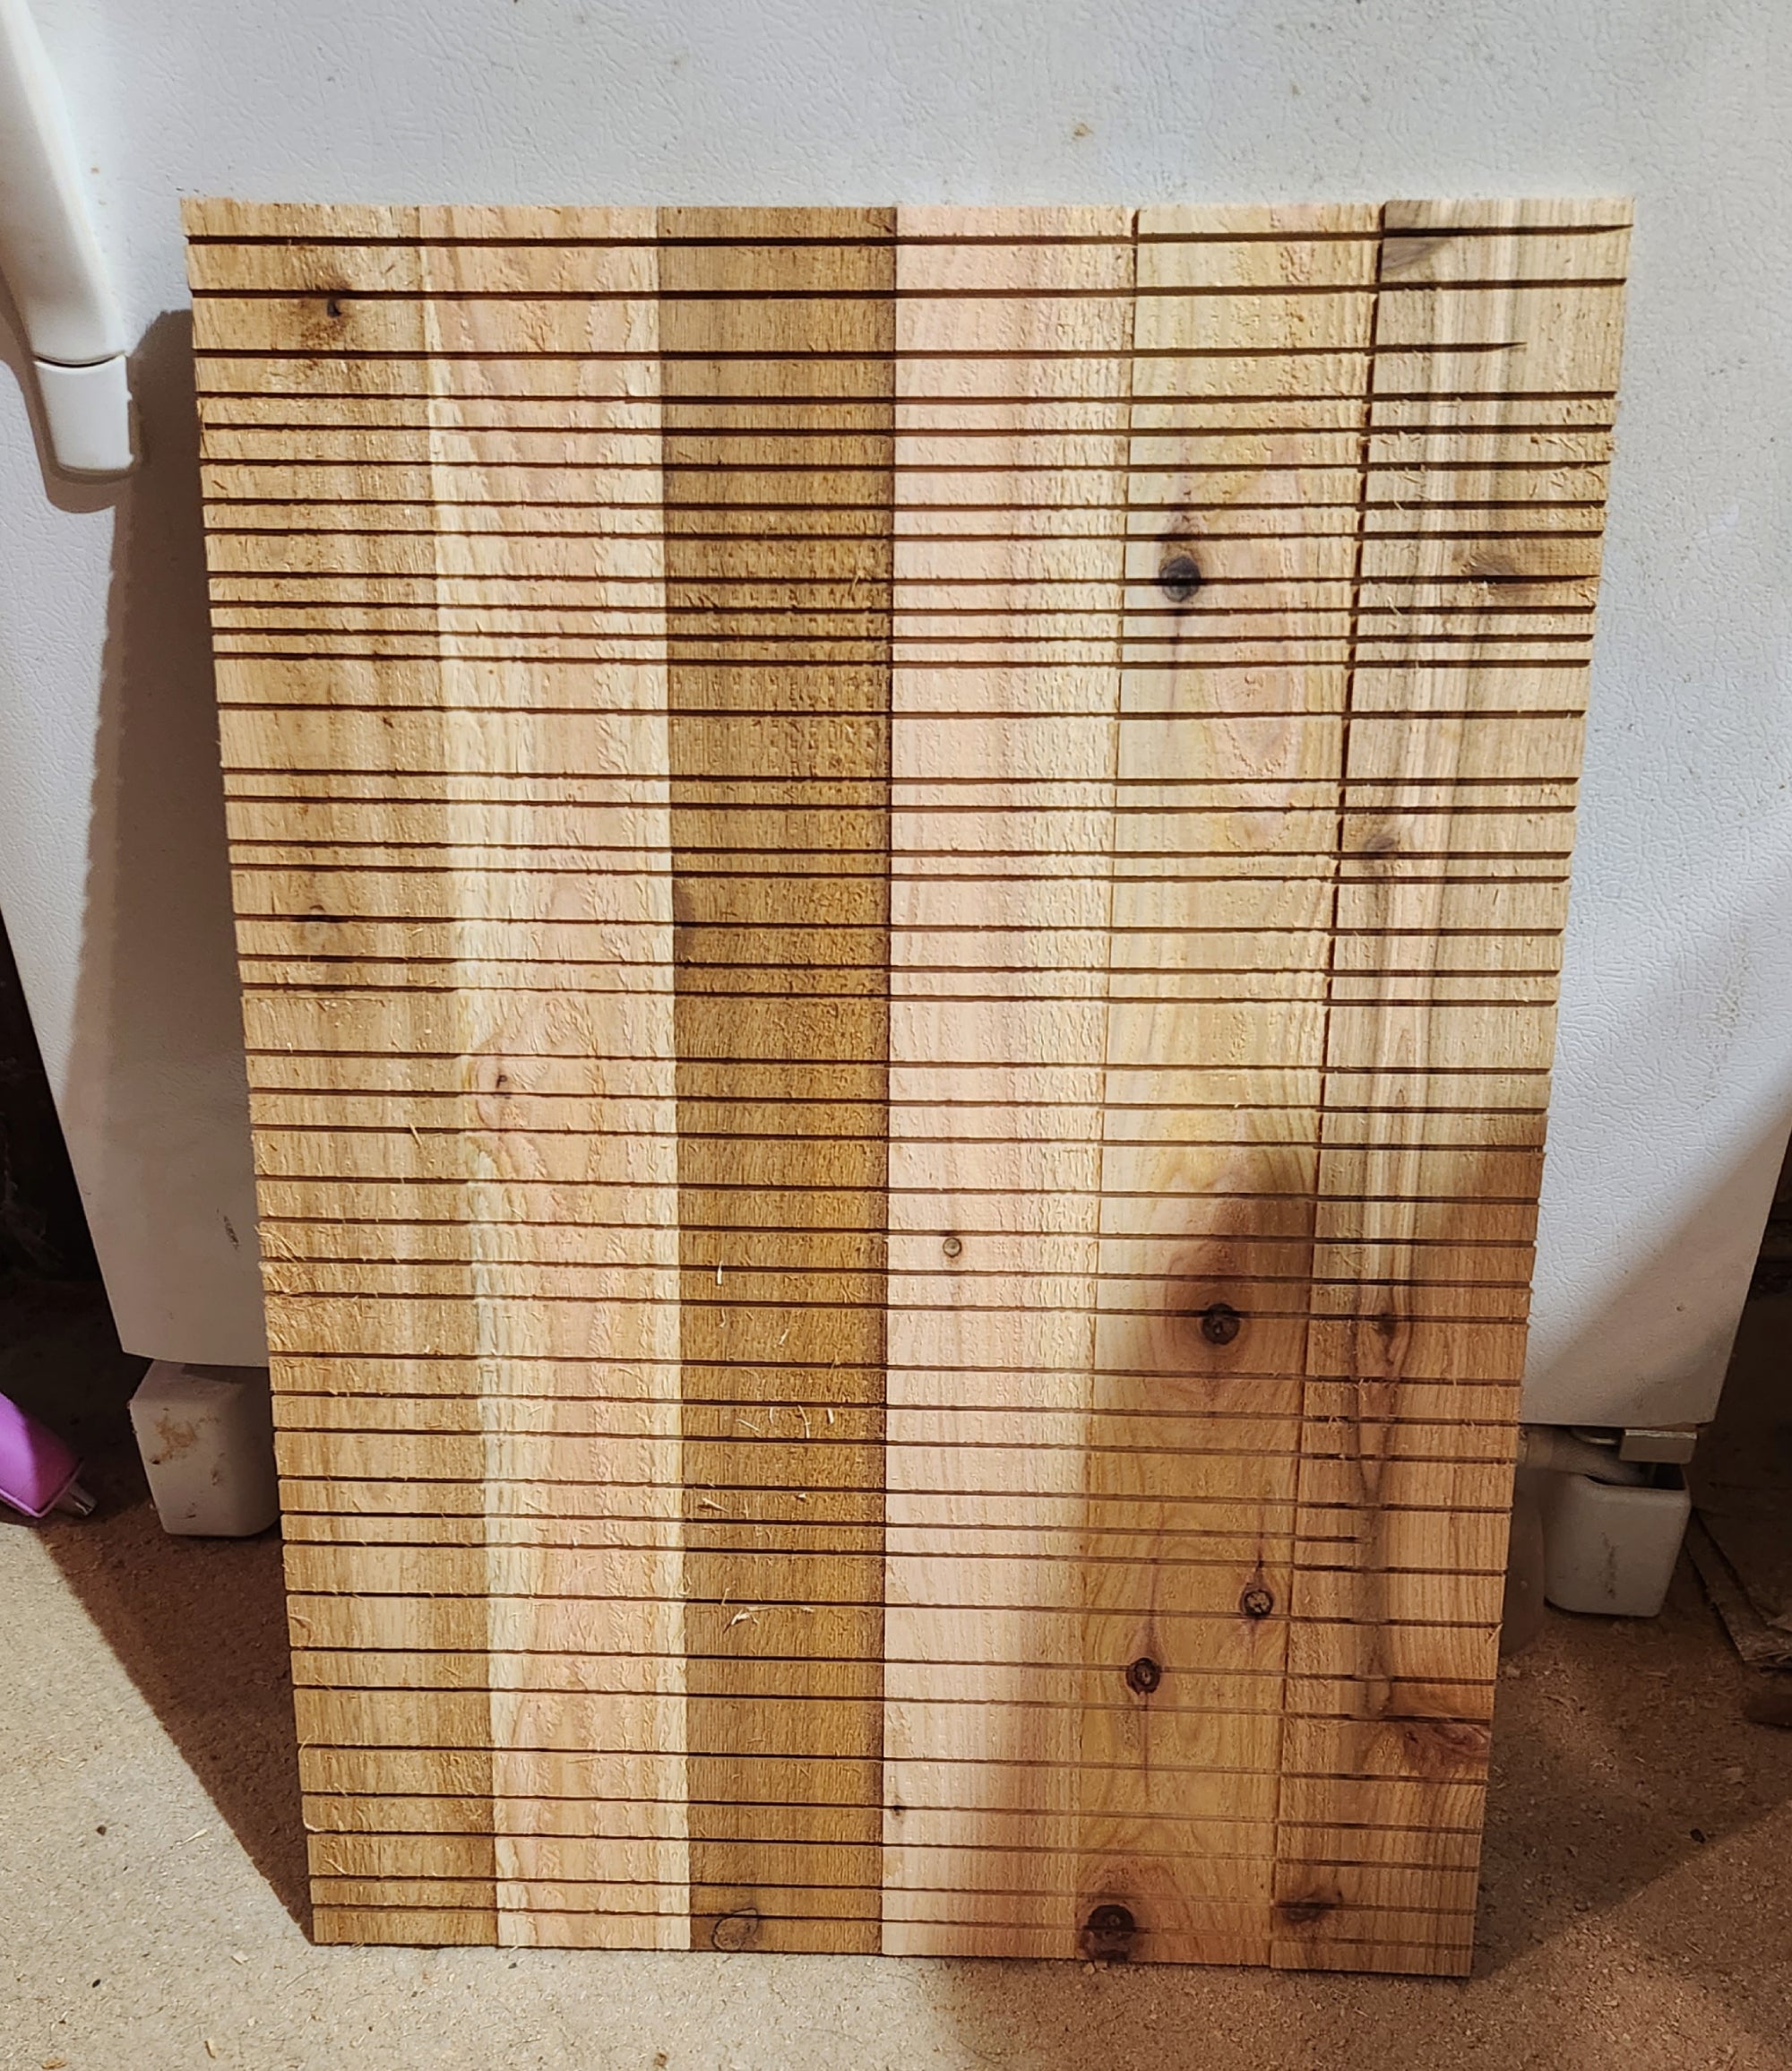
Set the height of your table saw to between 1/16 and ⅛ inch high. Then set the fence about a quarter-inch from the blade, and run all of your middle panel boards over it, on both faces. Then move the fence another quarter inch away from the blade and run the boards again. Continue until you’ve cut grooves along both faces of all eight boards.
- Note: Older bat house plans might recommend installing wire mesh, but many conservationists now recommend against that because there’s a chance the bats will get tangled in it.
7. Square the front and back panels, then cut grooves. Once these two panels are dry according to the glue manufacturer’s instructions, trim both ends of one panel, squaring them to its edges. The easiest tool for this is a crosscut sled on your table saw. Once the ends are square, leave the panel on the sled to cut graspable grooves. Set the blade height between 1/16 and ⅛ inch, and cut grooves every quarter-inch or so. These don’t have to be precise. Just slide the panel over a bit at a time. Repeat this step with the other panel.
- Warning: This is the sort of operation where it’s easy to lose focus and hurt yourself by grabbing or moving at the wrong place or wrong time. Make sure you pull the sled all the way back so you can freely move the panel without touching the blade.

8. Assemble the first chamber. Lay the back panel down flat with the textured and grooved side facing up. Place the rails onto the face, aligned with each edge and with about 2 inches between the top of the panel and the start of each rail. This gap leaves room to hang the box. Glue the rails in place and further secure them with 1-inch brad nails.
Then glue and brad nail the 18-inch boards across the rails to form the middle panel. Clamp everything together until the glue dries.
9. Assemble the second chamber. Once the first chamber is secure and dry, build the second, gluing rails to the middle panel and securing the front panel to those with glue, clamps, and brad nails.

10. Add a roof. Glue and brad nail one final board, 18 inches long and 3 inches wide, across the top of both cavities as a roof. Rather than cutting a dedicated piece to size, however, I used some of the cutoff scraps I had, making sure to butt them as tight together as I could.
11. Sand everything smoothish. This is one of those magical projects where sanding doesn’t matter too much. I used 60-grit sandpaper on my orbital sander to clean up any boards that were slightly out of alignment or particularly rough. Then I sanded everything with 120-grit paper. Because the bat box will be painted, hung quite high, and won’t be touched a lot (by people anyway), there was no point in going further than that.
12. Fill in all the gaps with caulk. “Make sure that all of the seams are tight and there aren’t a lot of gaps because heat is the key thing,” says Mizejewski. “The bats really want it to stay warm in there. If the bat house is drafty, that’s going to make it less attractive.” Fill in all of those gaps between the panels and the rails with exterior-rated painter’s caulk. If you’re planning to stain your box, which you can do if you live in a warmer climate than I do in New England, you might want to use stainable wood filler instead of caulk.
13. Paint or finish the exterior of your box. Keeping with the theme of creating a warm house, it’s important to maximize the amount of heat absorption the box gets from the sun. That means dark colors. Bat Conservation International recommends painting bat boxes black in cold climates, but if you live in a more temperate climate, a dark brown paint or stain can be enough. If you live in a particularly warm area, you may be fine leaving the natural color of your wood.
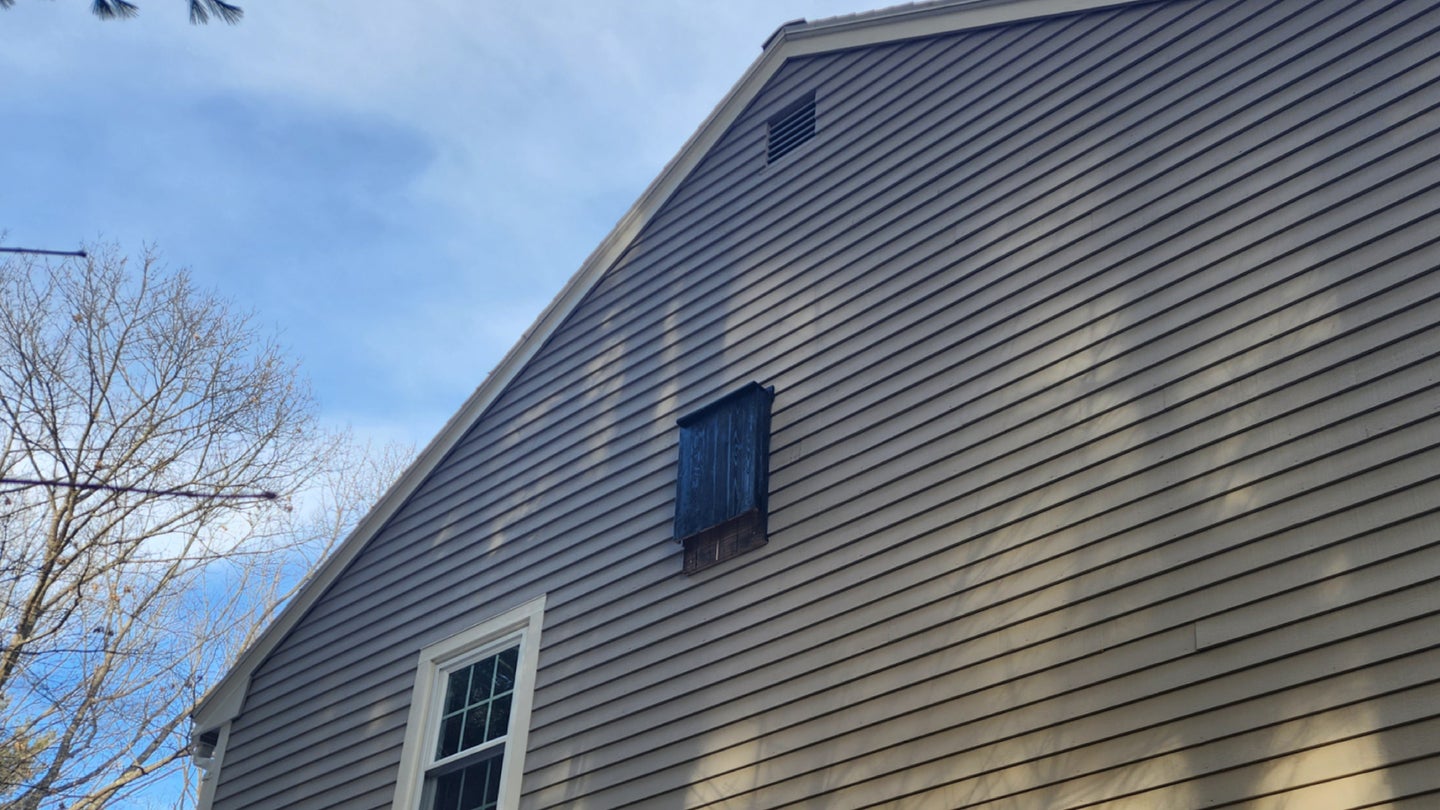
14. Hang the box. “This is probably one of the more important things if you actually want the bat house to work,” says Mizejewski. “Mounting is what people often get wrong, and then the box does not work.” In order to move in, bats need to feel that the box is warm enough, close to water, and safe from predators.
[Related: How to get a bat out of your house]
Oddly enough, hanging bat houses on trees doesn’t work well, even though bats often roost directly in trees. It can be too shady and cool among the branches, and it’s easier for predators to climb up and into the box. Instead, it’s best to install bat boxes on the side of a building or on a pole, between 10 and 20 feet in the air. Bat Conservation International has put together a few documents for the best installation methods, whether on a pole or on the side of your house or another building.
- Warning: Hauling an unwieldy wooden box up a ladder isn’t an easy or risk-free task. If you decide to hang it on a pole, Bat Conservation International suggests it’s best to fasten it to the pole first and then stick the pole in the ground. Otherwise, you’d better be comfortable climbing and follow all ladder safety precautions.
Once the bat box is up, it’s time to sit and wait. And wait. And wait. Bats don’t move on our schedules, unfortunately. If you don’t see any sign of bat activity after a couple of years, it might be time to take it down and try a new location.
But when you do hit the sweet spot and a colony moves in to raise their babies, you can rest satisfied that your hard work helped give these creatures a place to call home, at least for a little while.
